
Supplies for this card
Cardstock :
Gable Green : 5½"” x 11"”, scored at 3½"” and 7"”
Gable Green : 6 1/8"” x 5½"”, scored at 4¼"”
Basic Black : (2) 2½"” x 2½"”
Lovely Lilac : (2) 2¼"” x 2¼"
Ink : Green Galore, Black StazOn
Stamps : Cheesecloth, Booglie Eyes, Halloween Backgrounds, All Year Cheer II
Accessories : Basic Black Marker, Watercolor Crayons, Deckle Scissors, Aquapainter, Black Organdy Ribbon, Bone Folder, Stamp-a-ma-jig, 1 3/8" Square Punch, Mono Multi liquid glue
*******************************************

1.) First you need to score each of your Gable Green pieces. The 5½" x 11" needs to be scored at 3½" and 11". The 6 1/8" x 5½" needs to be scored at 4¼" (this will create your 5½" x 4¼" card front).
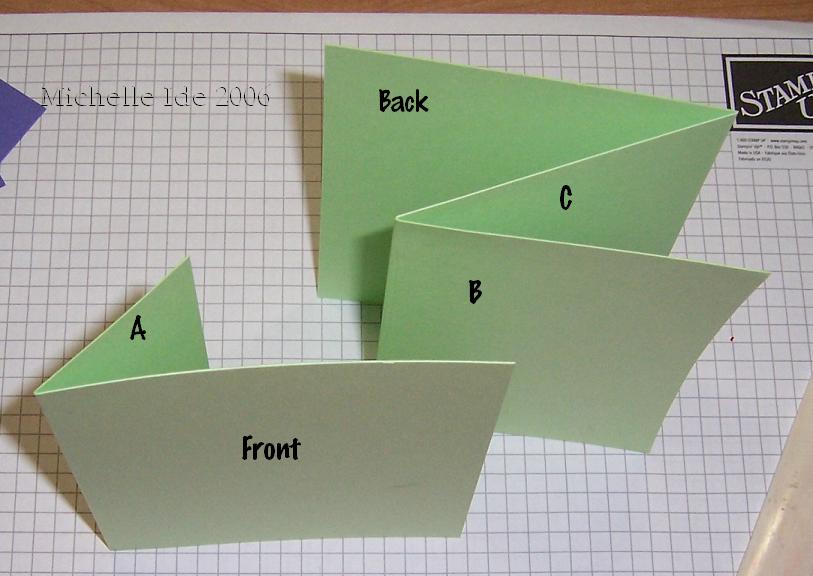
2.) Fold each piece so they look like this (the long piece should look like a backwards Z with the larger fold towards the back).

3.) Punch a square hole through the smaller two layers of the long piece. Fold them together and push the punch down from the top as far as you can and then center it between the the folds.
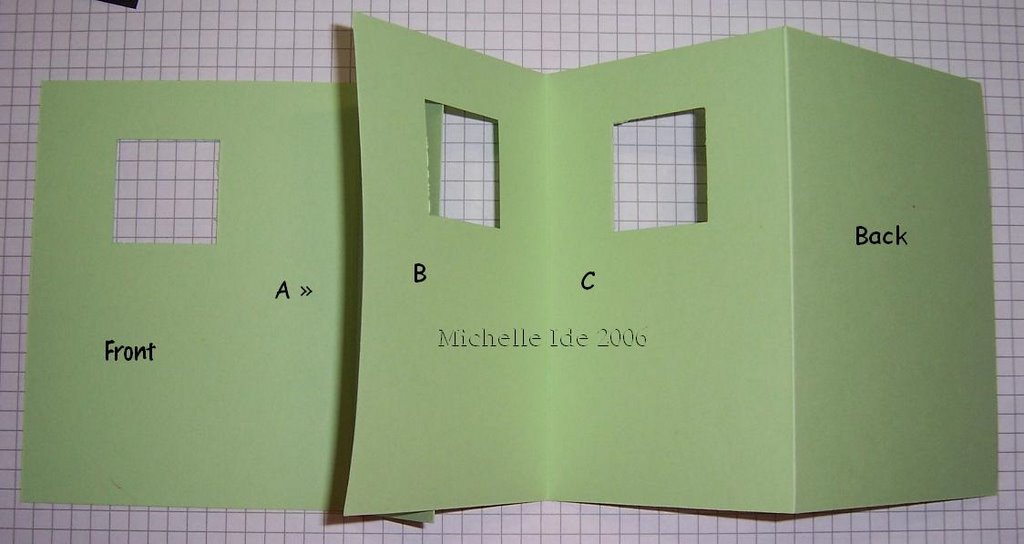
4.) Next line up the RIGHT edges of the front fold and the B fold. Punch a square hole through the front lining it up with the square hole in the B fold. Your two pieces should look like the ones above.

5.) Decorate the front layer and the C layer keeping any saying at least ¾" from the bottom of the square punches.

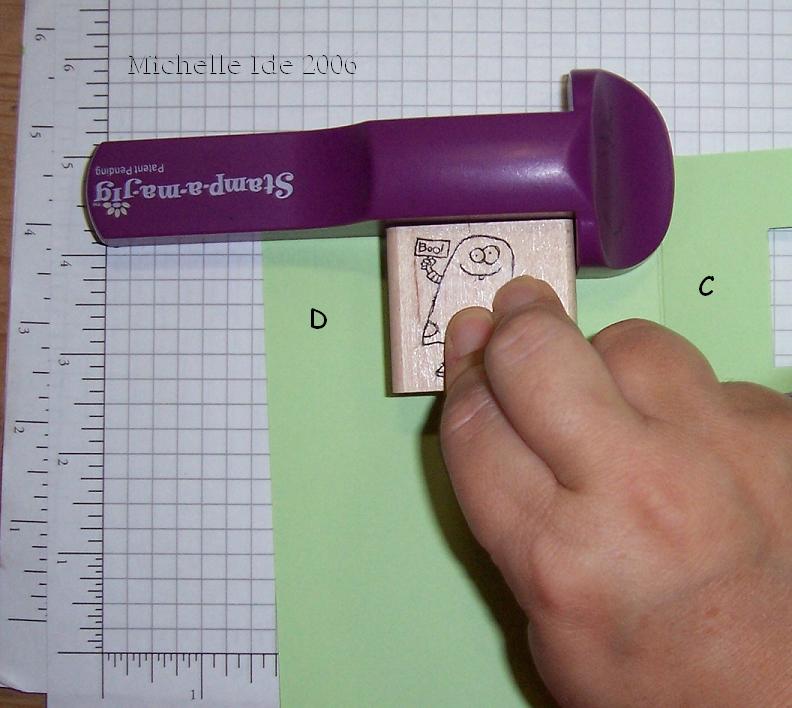
6.) Using the Stamp-a-ma-jig, stamp the image that you want to see when the card is closed through the square hole while the larger piece of Gable Green in folded up. The image will be stamped on the Back fold of the card.

7.) Glue the B fold to the back of the front piece (apply glue or mono to the B fold only).
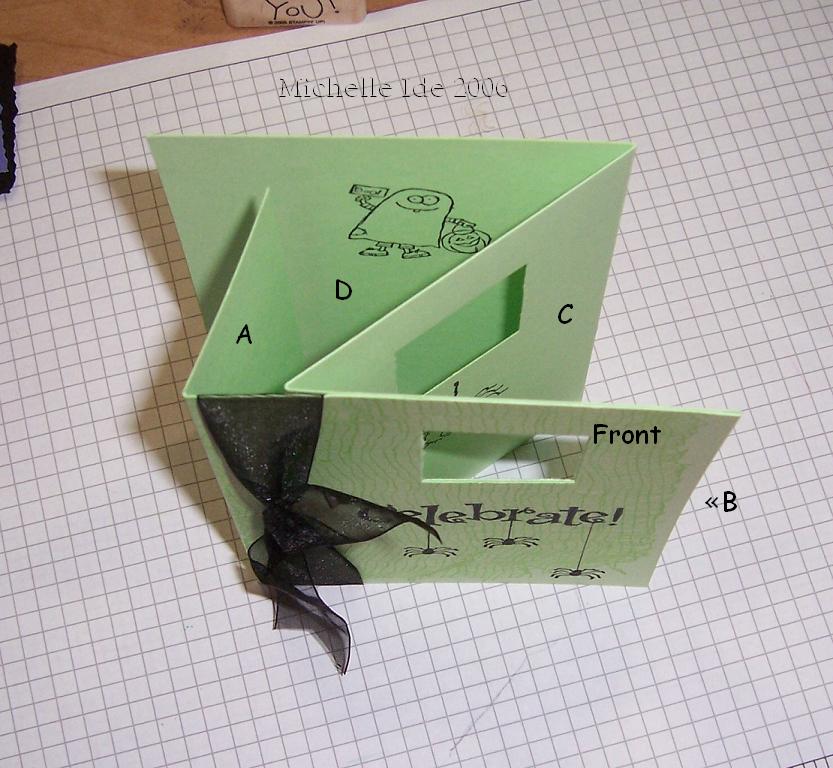
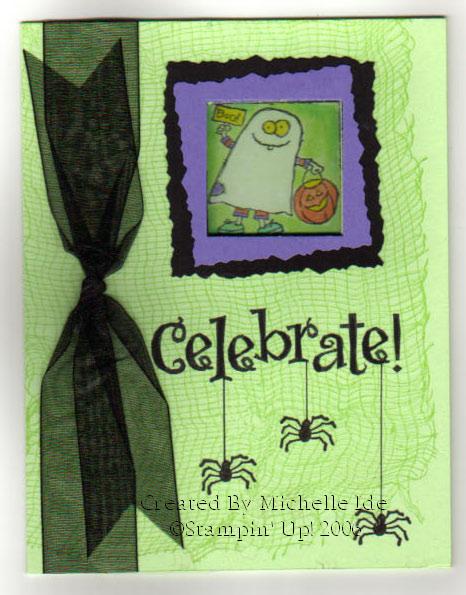
8.) At this point your card should look like the card above.
NOTE : When your card is closed you may see the edge of the A fold through the front window. If this happens, trim enough of the A fold so you don't see it. I use the square punch to trim this piece (you can see the image for step 13).

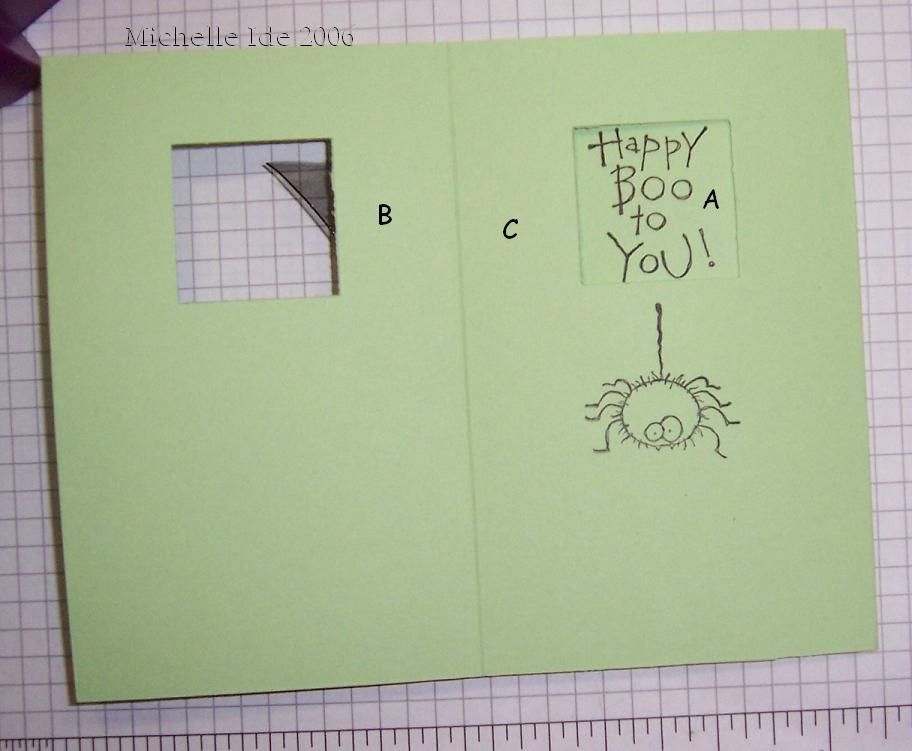
9.) Open the card and and the A fold will now be showing through the square punch. Using the Stamp-a-ma-jig, stamp a saying on the A fold.


10.) Tack the Lovely Lilac and the Basic Black squares together using a small bit of mono in the center. You can line them up centered or at an angle as I have. Next, (I saw this tip on a blog and can't for the life of me find it now ~ thank you whoever you are!!) using a pen or pencil, draw lines on the back of the squares from corner to corner creating an X. Use this X to center the piece in the square punch and viola!! You have a perfectly centered hole. Too cool huh?

11.) I used deckle scissors to trim the edges of the frames and then glued them together. Then adhere one set to the front of the card and the other set to the C layer of the card.

 12.) Using your Watercolor Crayons, color the images.
 13.) The last step is to apply a line of adhesive or mono right next to the fold on the back layer. This will keep your card together and not allow the back layer to open up.
*************************************
I hope that these directions are clear. If you have any questions just ask!
13.) The last step is to apply a line of adhesive or mono right next to the fold on the back layer. This will keep your card together and not allow the back layer to open up.
*************************************
I hope that these directions are clear. If you have any questions just ask!


