.

9/28/2006

Happy Halloween

It's difficult trying to show seasoned stampers new techniques and more advanced cards. They've seen it all and are hard to impress. I was looking through the paper work for all of the classes that I've done and all of the ones that I've been to and came across a "Peek-a-Boo" card that I made almost 4 years ago. I knew that this was the one. As I looked at it this idea came to me and it turned out exactly as I wanted. It's so nice when that happens. In order to understand the peek-a-boo part I had to take three pictures of it. The colors didn't come out too well on the first two but the third one shows the real colors (Gable Green, Lovely Lilac, Basic Black). This is what it looks like when it is closed. I need to buy the larger square punch as this image just fit in the opening. Here it is half way opened. You can see that another piece slides out to block the first image with a saying. Fully opened you see the second image. Hope that you like it. I have a picture tutorial coming.

9/23/2006

Today is my monthly Christmas Card Class. They are making 12 cards in 3 hours so I try to have fairly easy projects for them. Here are the four projects that I came up with for this month. This is made with the new Peaceful Wishes set. I'm still trying to come up with a design that I like using the pinecone. I don't use Handsome Hunter and Sage Shadow very often but really like how they look together. This one is very simple. Just using Gold ink to stamp the snowflakes and then embossing the words and the inside saying with Gold Embossing powder. I was trying for the simple yet elegant look. Hopefully they like it. I try to use at least one unusual color combination each month and this is it. Do you ever use a color combo and just love it? This is it for me. I love how these colors look together. There is glitter on the ornaments that makes them look cloudy in the scan but they're not in real life. What's a Christmas Card Class with out snowmen. This is one of the first sets that I bought from the new catalog and when it arrived I was surprised to see that the three long images were one stamp. I cut the block into 1½" x 3½" sections and mounted them separatelyly. I also used the Cutter Kit on this to distress the edges of the back white layer.

9/21/2006

I think that fall is here to stay!

Fall is my second favorite time of year.
  • I love how the nights are cool and crisp with no humidity but when the sun comes out it warms up everything!
  • I love how the leaves change to such beautiful colors.
  • I love the way they smell and sound as they fall from the trees and the kids play in them.
  • I love going to field hockey and soccer games.
  • I love apple picking with my family.
  • I love baking fall recipes.
Hopefully I will be going apple picking this Sunday with my sister, niece and nephew. My husband is looking forward to warm apple pie with a scoop of vanilla ice cream.
***********************
I had my stamp club card class this past weekend and wanted to create cards that show what I love about this time of year. Here are two of the three projects that we made. Simple Sketches is one of my favorite sets but I don't use it that often. It was the perfect choice to try and created the many colors of fall. I made a few more of this design and stamped various sayings on them. I have to restrain myself when coming up with pages and cards for workshops and classes or they would all have some type of watercoloring on them. I can remember coloring for hours at a time when I was young. This card uses two of my favorite In Colors, Marigold Morning and Cranberry Crisp. They are a perfect match.

8/31/2006

Join Nestles Chocolatier to receive a coupon for a free bag of NestlĂ© Chocolatier™ Baking Chocolate. http://nestlechocolatier.fanspeak.net/?C1853_537733

8/28/2006

Creating my Snowmen Pop-Up Card

I've had quite a few people ask how to create the Snowmen Pop-Up card that I posted so I made a picture tutorial, I hope the directions are clear. It is really a simple card once you've seen it done. Let me know how you like it.
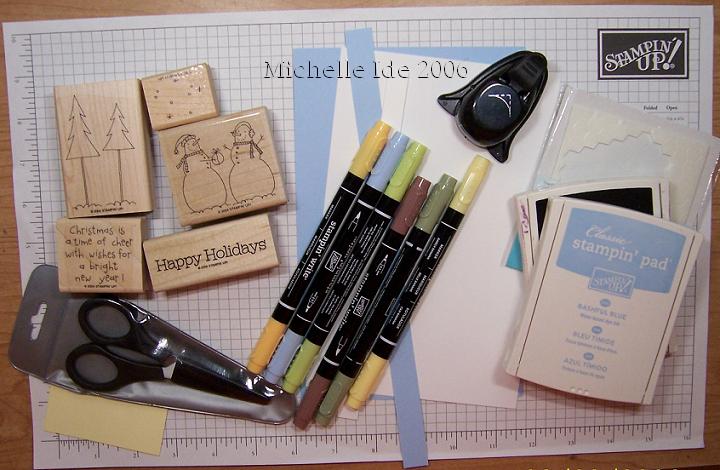
Here are the items I used to create it and the basic recipe :
  • Bashful Blue cardstock 8½" x 5½"
  • Whisper White cardstock 8¼" x 5¼"
  • Whisper White cardstock 2½" x 2½" (for stamping the snowmen image)
  • Bashful Blue 2 5/8" x 5/8" (for layering the title)
  • Whisper White 2½" x ½" (for title)
  • Basic Black ink
  • Bashful Blue ink
  • markers
  • Post-It Notes (for masking the trees)
  • Scissors (for creating the pop out tab and for cutting out the snowmen
  • Adhesive (I use Tombow Mono Multi Liquid glue)
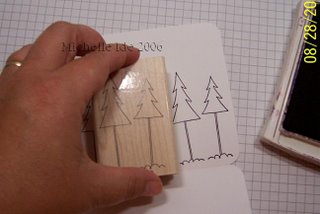
Fold both of the large sheets of cardstock in half (I corner rounded both). Then stamped the trees on the top half of the whisper white. Stamp the snowmen image on the square piece of Whisper White and colored all of the images with the markers. Create a mask of the trees using a Post-It Note and use it to stamp snowflakes on the background. Cut out the snowmen image. You don't have to cut too closely, as you can see I leave about an 1/8" white border around them. Fold the Whisper White cardstock and cut two slits, about ¾" long and ¾" apart, on the folded edge of it. Push the tab back into the card and press to create sharp creases. Apply glue to only the bottom half of the tab. Attach the snowmen slightly above the crease of the tab.
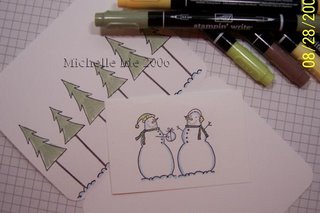
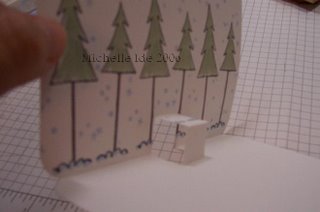
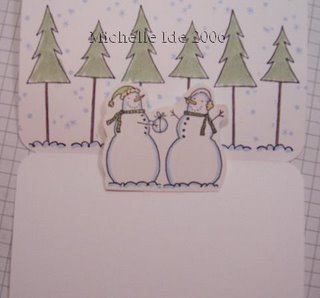
Glue the Whisper White to the inside of the Bashful Blue and add the finishing touches. I stamped snowflakes on the outside of the card with Bashful Blue, Created a title and attached it to the card with dimensionals and then stamped a sentiment in front of the snowmen.